My Happy Places

Recording and sharing successes, joys and the dilemmas of growing my own veggies and eating healthy……………..


Leave a comment

My veggie garden plan

I had been wondering how I can plant veggies and use the tiny space in my garden to get the greatest yields.  I was inspired by my former landlady who had the most amazing veggie garden in Winnipeg Manitoba Canada in the mid eighties. She grew veggies during the short Canadian summer and froze enough to last her for the entire year. Her veggie garden amazed me and its memory has stayed with me for nearly 3 decades.

I was also inspired by the Vertical Veggies website which I found via Facebook.

The little plan I made may be changed slightly as I go along but its a start.  Garden plan.

Only some of it has been planted and I am ticking off on a hard copy as I go. I’ve finally managed to learn how to post photos albeit a bit crooked ones so this is how some of the plan translates to reality.

Last year, I managed to grow chillies very successfully in a grow bag from The Warehouse. So I decided to recycle one to grow climber beans and maybe yard long beans too. The bag came with a wire structure to train the plants but I’ve used two cane rods from last year to reinforce the structure.


Herb pot, beans in a grow bag and corner of the bed with Asian greens

The herb pot looks great and saves space. I’ve not been too successful with coriander (Cilantro) before but hopefully this year it’s not jinxed!


My new herb pot. The coriander is growing nicely but the Chives, Basil and Thyme (not visible in photo) are not doing so well yet.

I also need to plant more herbs in separate pots as the herb pot only has room for 5.  More on that later.


Leave a comment

Nuno felted silk merino vest

After my first successful Nuno felted jacket, I wanted to create a silk merino vest for my daughter.

I used Ashford silk merino in a soft blue, aqua, green mix and a very light silk chiffon as the base. I also had some beautiful art yarn which I used to add some glitter and texture.

The silk chiffon was first hand painted in a variety of lime, green and olive shades using silk paints. I stretched out the silk on a frame and did a wash of all three colours using a large paint brush allowing colours to bleed into each other. Then I sprinkled some coarse sea salt to give it a dotted salt effect. When dry, I steam fixed the chiffon and felted on it. The purpose of doing this was for the painted silk to show through the fibre but when I was felting, I didn’t like the colours so most of the silk is hidden now but the deep lime changed the colours of the finished product.

I used layers of very fine silk merino on either side of the chiffon. I used olive oil soap and cold water to start the felting, rolled 200 times x 4 and used the throwing method to full the felted pieces. The vest was done in three pieces, back and two front pieces and fastened with a self felted button I made using offcuts of the felt and a button kit.

Once I rinsed and dried the pieces, I machine-stitched the shoulder and side seams. I needle felted more fibre into the seams which were machine stitched to hide them.

I used a beautiful art yarn in matching shades which I purchased at a craft fair years ago to crochet the edges which added more texture to the vest. Finally I sewed the button and invisible fasteners.

Please see pictures below: Click on them to see enlarged versions.


Leave a comment

My advent into Nuno felting


I learnt felting a few years after I moved to New Zealand. I did a felting class a few years ago and got hooked. During a bout of unemployment following redundancy, I turned to felting and made some scarves which I sold online. Once I found a new job, I didn’t have time to felt and the remaining scarves were gifted away or used and my interest in felting slowed down. However, I kept on reading about it as I was still keen.

Recently, I started felting again and thought I should try nuno felting. For those of you who are not familiar with it, nuno felt is made by felting silk material with merino or other very fine wool to make a beautifully soft felt that drapes well.

My first attempt at making nuno felt was a total disaster as I misjudged the temperature of the water used. I also used too much soap. Maybe the type of silk I used was too thick too. My wool felted well but not to the silk. Luckily it was a test piece of fabric and not a garment but that experiment led to my wanting to learn more and master the craft.

I purchased a nuno felting tutorial on Etsy which was a rip off. I paid $10 for it but the instructions were vague and not at all useful. The beautiful image used was total misleading and the instructions were not useful to me. However, a book on Nuno felting taught me the basics and I did my first Nuno scarf from a kit which gave me confidence. I added my own twist to the scarf and also made a matching felted brooch so my scarf got many a complement whenever I wore it.

My latest felt project is a soft jacket made using silk merino and silk chiffon for my six month old grand daughter. I used a lovely soft colour called Sorbet from Ashford wools in New Zealand and a beautiful silk chiffon as the base. The body was made in three pieces with shoulder and side joins which I hand-stitched and then the seams were needle felted so the seams are not visible. The sleeves were felted separately and attached. The pattern has a cross over front which I fastened with plastic fasteners and six felted buttons made using offcuts of felt which adds a lot of value to the jacket. I also made a detachable hood using a much thinner fabric made with very thin layers of silk merino on silk chiffon which was fulled in warm water so the hood is a lot more crinkled than the coat. I did this purposely so that the hood looks different.

The jacket looks lovely and is as soft as a feather. I am waiting for cooler weather to see my little princess in it.

I took some photos of the finished product (minus the detachable hood). Please click on the thumbnails to enlarge them.


3 Comments

My first ever Elizabeth Zimmerman baby surprise jacket set

Ever since I first saw the Elizabeth Zimmerman baby surprise jacket or BSJ, I’ve wanted to knit one as it was extremely intriguing. It was designed by knitwear designer Elizabeth Zimmerman in the 50s. The original pattern was published in one of her newsletters and later republished in her book, “The Opinionated knitter”.

I found that the pattern was on sale on Ravelry.com but I managed to find the original newsletter. The pattern was not one that anyone could follow as it has instructions that confused me. My first attempt at knitting a jacket for my boss’s baby Hamish ended in a disaster and by the time Hamish was about to be born, I was in total confusion. So I crocheted him a pair of booties and decided to knit one for his first birthday.

Then, I heard the news that my daughter was expecting our first grandchild and I decided to pursue my obsession. I dug up the photocopy of the Zimmerman pattern and knitted a swatch to test the gauge as Mrs Zimmerman does not give you needle sizes nor row by row instructions but uses terms such as “wool A gauge 6 sts to 1” or yarn B gauge 5 sts to 1 inch and 1 pair needles to give you either of these gauges”.

I used variegated merino wool that gave me 6 sts to 1 on 3.5 needles. I also found a few instruction clips on YouTube that unravelled the intricacies of Mrs Zimmerman’s knitting gobbledegook. A couple of days and a lot of swearing later, I completed the jacket. It, as Mrs Zimmerman predicted, did not look anything like a jacket before it was sewn up but in 4 days of intensive knitting, I had produced a cute little masterpiece.

The next challenge was to complete the booties and they were a challenge. I slightly changed them from the original pattern. I also added a crocheted trip and bobbles at end of the ties. I managed to knit a baby bonnet to complete the set two days after my little granddaughter was born.

baby surprise jacket

BSJ (2)

BSJ (3)

BSJ (4)

BSJ (5)

BSJ (6)

BSJ (7)
Here are the photos that prove that I did it and I am very proud of it. I will post photos when the baby wears them later.

Now to start my BSJ no. 2.


Leave a comment

Sri Lankan food – Potato toffee

During this year’s Sri Lankan New Year celebrations, I decided to make Ala Dosi or potato toffees. I have not made it by myself as my mother and aunt were both experts at it so they made it always and I only watched over their shoulders or helped them stir the mixture.

I have not made this favourite sweet of mine since my aunt passed away and although she has given me the recipe many times, I had not written it down and had to rely on my memory. I also made some modifications to it but the sweets came out perfectly.

The tricks to getting this sweet exactly right is using a thick bottomed pot, the constant stirring of the mixture and knowing exactly when to take the mixture off the heat.

Ala dosi/potato toffee

Ala dosi/potato toffee

Asoka’s Ala Dosi or Potato Toffee recipe

Ingredients:

1 lb/450 gms of potato, boiled in their skins, cooled, peeled and mashed finely

1.5 lbs/675 gms of white sugar

3 tablespoons thick coconut milk or canned coconut cream

Half a teaspoonful of cardamom powder

Half teaspoon vanilla                                                                                                                                                                

A small knob of butter

Food colouring (I used green)


Method:

Lightly butter a wooden board or shall dish approximately 8 x 8 inches (20 x 20 cm)

 Use a heavy bottomed clean pan and place the sugar and coconut milk (or water) in pan. Stir and leave for about 10 mts. Stir over a very low heat until all the sugar dissolve. Then increase heat to medium and bring to a rapid boil. Add all the mashed potato and stir well until thick and creamy.

Make sure that you keep on stirring the mixture so that it does not stick to the bottom of the pan. This is not a dish that you can leave and come back to. When you can see the sugar crystals forming around the sides of the pan, take the pan off the heat and stir well for another few minutes. Add vanilla, food colouring if using and the butter and keep on stirring till well mixed.

Pour mixture onto the dish or board (I prefer to use a board) and then scrape the hardening mixture from the sides and bottom of the pan using a tablespoon and a butter knife onto the top of the mixture on the board. This will help the mixture to harden well. Flatten the mixture to an even height of about 1 inch/2 cm and mark into strips of about an inch in width. Then mark squares while the mixture is still soft. Cut to separate pieces, cool on a plate/work surface and store in an airtight container. Should keep for a week or more but I can guarantee that they will be popular.

Makes approx. 60 small pieces.


Leave a comment

Creating a necklace out of recycled finds

I am sorting through my craft stashes and trying to find use for some of them before I throw out/recycle them.  I found these bracelets some time ago which had some pretty beads and separators but also had some ugly great beads. I meant to use the pretty beads when I bought them but they were in my craft room for months.

I was gifted a stunning necklace by a friend sometime ago which always attract comments from friends whenever I wear it. This necklace is made out of beads covered with crochet yarn in two shades and with silver beads. It has an organic feel to it which I love.

I’ve been thinking of making a similar necklace but didn’t get around to it until I managed to find the above mentioned  beaded bracelets from an op shop which I paid $2 for each.

I decided to cover some of the separator rings in black and cerise thread to match an outfit and use some of the beads. I couldn’t find cerise crochet thread so I used a few strands of cerise embroidery thread and used the left overs of black crochet thread I had in my stash.

I used a copper wire that was left over from my beading projects and threaded the beads and covered the ends of the thread, a loop at one end and  bead at the other end with black wool crocheting it to made a thin padding. Then I wound black crochet thread to cover the padding. I used craft glue to glue the thread ends.

I’ve managed to make a nice necklace to match my new cerise jacket that will be worn with a black top and black pants.

Here is the result. 

close up of the thread necklace

Thread necklace

close up of the necklace

Thread necklace close up

My finished look below:

Image

Not bad for half a morning and a total cost of about $2 I suppose.


Leave a comment

A post mortum of summer before winter sets in

Yesterday was the first day of day light saving in New Zealand. After the long never-ending summer this year, it is a bit sad to lose daylight hours but it has been a little difficult getting up in the mornings lately.

My garden was a bit neglected lately along with the blog but we’ve eaten a bit off it. The three green chillie plants have supplied us with a steady supply of green chillies; we haven’t bought any green beans this summer as I’ve had a massive harvest of it. The lettuces were doing extremely well in Spring and mid summer but towards the end of summer, it was so hot that any replenishments I planted just wilted off in minutes so I didnt bother replacing them. All the herbs have done very well and the tomatoes and cherry tomatoes were OK. However, I will not plant them in pots hereafter but find space on the ground as they do so much better than in pots.

The bitter gourd or Karawila (in Sinhala – Karela in Hindi) wine which is climbing the wooden wall has started giving me at least 3-4 ripe fruits a week. As I am not much of a fan of this bitter fruits, I give them away but I love to see them growing and plant them every year. I might freeze some to use in winter as they are very good to control blood sugar and are also an expensive vegetable.

The use of grow bags for potatoes, sweet potatoes (what we call Kumara in New Zealand), KangKun (Ongchoi) and strawberries was fine and we have eaten Kangkun at least every week or fortnight as the growth has been great. I havent yet harvested the Kumara but the healthy growth of the plants and my sneak peeks of the tubers promise a good harvest too. I’ve eaten strawberries with my cereal often and I will continue to grow them in their cheery little red grow bag.

I replaced the green beans in a grow bag with spinach, a few weeks ago, keeping the principles of crop rotation. I used the same soil but topped up with a bit more potting mix and worked in a handful of blood and bone fertiliser and the spinach is growing well.

In previous years, I dont plant anything in winter but let the veggie plot go wild but this year, I decided that I’ll try a bit of winter planting.

I planted a packet of seeds to grow Kale which is one of the new super foods and it looks pretty. They took about a week to germinate and I need to replant them when they are a bit bigger. Meanwhile, I bought a punnet of ornamental Kale and planted them. Since I have a covered porch, I might have a few greens in pots in this area and planting a curly-leaved pot of Kale is in the horizon.

My banana chillie and green chillie plants are still in fruit so I will leave them and so is the parsley and Itallian parsley. I must dry them or freeze them as there is only so much I can use. I completely forgot about my box of pretty mesculun which has now gone to seed but I’ll collect the seeds for next year.

The ladies fingers (Okra) and Dambala (Winged Bean) grew well in grow bags but I didn’t get much of a harvest as I only had 2 plants each. We ate Winged bean curry once and I am leaving the rest to seed along with the 3 pods of Okra. The long bean (Yard long bean) which is now climbing the wall have a few beans which should be sufficient for one meal soon. They were all grown experimentally first time around for me to learn whether or not I can grow them.

I didnt get any photos for this entry but will do that soon.

In winter, I’ll try to update the Blog more with cooking and craft entries rather than gardening.


Leave a comment

Summer growth and produce

In my part of the world, December is summer and Auckland had  beautiful December weather. We have barbecues on the beach for Christmas which is a bit different and I do admit that I sometimes miss a white Christmas from my days in colder climes. However, I dont complain at all for not having severe winters in Auckland in my adanced age.

While I enjoyed the sunshine, summer visitors and had parties and accumulated excess baggage round my middle, my little garden has grown. A few days of not being in the garden and I found that I’ve got a massive crop of green beans and the spinach is looking like palm trees.

So over the last week, I did a bit of taking stock, cleaning up and as I anticipate at least another 3-4 months of use out of the garden, I wanted to plan the continuation of the garden.

My three green chillie plants have started flowering and I coaxed them with some fertiliser as the price of green chillies has skyrocketed due to the cyclones in Fiji apparently. I thought it was highway robbery to pay $32 per kilo for green chillies. I managed to pluck a few green chillies this week and there are heaps of white flowers in bloom.

My three tomato plants and the two hanging cherry tomato baskets are useful as I have been picking tomatoes as I wanted them for salads. The other day, I brought a salad to work with my own lettuce leaves, own tomatoes, basil leaves from a pot with a few olives and some cucumber which tasted beautiful. Hopefully I can pick a couple of cucumbers or gherkins soon.

The mistakenly planted courgettes plant was covered in a white fungus so I had to remove all the affected leaves. Hopefully, the cucumber plant hasnt picked up the fungus.  I might have to remove the courgette bush if I cant control it by spraying a mix of dishsoap and caustic soda – a tip given by a fellow gardner. I dont apply chemicals although I dont mind applying fertilisers once in a way if I have to.

My two grow bags of Kankun (Ong Choi) have been growing beautifully and I have had chicken with kankun stir fry once and a Sri Lankan fried Kankun with chillie flakes once. It is still growing for another harvest next week.

I cleaned up the wooden box where I grew spinach and added more potting mix and planted some mesculun salad leaves. I also replaced some of the lettuce with new plants as lettuce will keep on growing right until the onset of winter. In winter, I might grow winter varieties of it in pots but I am not much of a winter gardner and I leave my veggie plot to rest in our winter from June – August.

This year, I might continue a winter vegetable garden but for next year, I want to completely revamp the garden by having raised beds if I can.

I’ve revived the enthusiasm I had when I started the garden by trying to spend at least 15 minutes in the garden after work and first thing in the morning. Now I am in the habit of going into the veggie garden as soon as I get home and pick up something for dinner and then water/weed or tidy up.

Simple pleasures such as finding 5 ears of corn, flowers in the green chillie plant and pretty yellow flowers all over the bitter gourd climbing on the plastic mesh on the garden wall can reduce the stress accumulated over during the day in my day job.


2 Comments

Holiday project – Making a mosaic bird feeder

We have lots of feathered visitors who come into the garden to eat left over rice or breadcrumbs that I put out for them on top of the garden fence. I started using the top of the fence for this purpose as prevent the two much-loved resident cats from making mincemeat out of the feathered population.

Buddy, our older girl-cat loves watching birds from afar, her mouth twitching in anticipation and the end of her tail wriggling very slowly. Socks, the younger boy-cat, is not much of a bird catcher but still loves to watch them from his perches higher up on the sun roof or trees.

I’ve meant to create a mosaic bird feeder and a bird bath after I took a mosaic course many moons ago. The enthusiasm of the mosaic course resulted in my creating a lamp base and one pot holder but the interest died off, to be awakened on and off when I see a beautiful mosaic object. Over the Christmas break, I decided to test my knowledge and away I went into ‘ to find the items I needed.

What I bought:

a plastic pot holder

A pot hanger – chain with hooks

I already had the following from my mosaic class days:

tile glue, grout, an assortment of tiny glass and ceramic tiles, a few glass pebbles in greens white and blues

You will also need the following:

a bowl to mix the grout

a palette knife to spread the grout and glue

a few sponges and rags

water to mix grout


Mosaic bird feeder

Mosaic bird feeder


Method:


I used an electric drill to make three holes on the rim of the pot holder to fix the hooks of the pot holder chain.

Then  I cleaned the pot holder and wiped it dry. I used small glass and ceramic tiles and tiny tiles from a $2 shop for the centre and a mix of blue, green and white glass marbles for the outside. I spread tile glue on the backs of the tiles and pasted them at random in the middle starting with the oblong blue tile in the centre and moving out. Then I added a few tiny mosaic tiles at random and then used the marbles on the outer circle and rim. I added more tiny tiles to fill empty areas. Then left it to dry for about 24 hrs.

Next day, I mixed up the grout using the bottle instructions with water to get it to a creamy consistency and left it to stand for 10 mts as instructed. Then I applied it using a palette knife and a chopstick and then pushed it into all the crevices between tiles to get an even spread and got a neat edge on the rim of the holder. Then I used a wet sponge to remove excess grout from the surface of tiles and left it to dry for another day.

You need to make sure that the tiles are clean of grout.
Voila – a very basic but cute pot holder for the back garden. Judging by the feedback on my Facebook page, it’s not bad.


Leave a comment

Summer is here and harvesting begins

First day of summer in our part of the world DownUnder………..

I spent a good part of my weekend gardening although only Saturday had good weather. Sunday was windy and clouded but the rain didn’t fall till late in the day, so I was still able to put in a good four hours of work.

I mostly worked on the back garden which I have tried to recreate from a shady jungle into a shady retreat with a pond and water feature, ferns and green plants and a hammock. I decided that I need some colour and flowers so cajoled the husband into creating a bed to plant a flower border. He found a previous owner had created a brick edging which we used as a border to secure a wooden garden edging and filled it to the brim with compost and potting mix and raked it all in. Then I planted a few flowers mainly in white, creams and yellows. I also sneaked in a rosemary plant and planted a white clematis to be trained to climb the wooden wall.

On the Sunday, I cleaned up the veggie garden. The beans are now about the size of my little finger and my spinach was overgrown. I picked up a large shopping bag full of spinach and since I didn’t feel like eating it all, I decided to freeze it to use later. I washed it first in salt water to remove any bugs; drained well in a salad spinner and then chopped coarsely and immersed in boiling water for about 3 minutes. Then I drained it and plunged into ice water and drained again and packed the spinach into  ziplock bags, labelled and voila! I had three bags of spinach which is my first harvest in the freezer for this year.

I use spinach to make Palak Paneer, a delicious Indian dish that uses Paneer or curd cheese. I also love to make   little spinach and feta pastries which has become one of my signature dishes for work morning teas. Salmon and spinach pies are another lunchtime staple I make in a pie maker or muffin tins and spinach is also great in quiches, individual and large ones too.

During  my Sunday market trip, I found a few winged bean plants which I have been trying to grow for years. I am not a major fan of wing bean or Dambala (in Sinhalese) but its an exotic vegetable which I have only seen for sale in the Avondale market in summer. I bought the 4 remaining plants and planted them in a grow bag. I barely have any room in the veggie plot but managed to squeeze in three more grow bags I found for sale at The Warehouse for under $10. One of them has an okra plant, the other a few plants of water cress/Kankun or Ong Choi and the other the treasured wing bean plants.

The tomato plants now have baby tomatoes peeking among the leaves and I’ve been trimming out excess leaves to enable the fruit to grow. I also pinch out some of the buds leaving the healthier flowers to grow into larger fruits, a trick I learned years ago. The cherry tomato baskets are looking good. I planted a courgette plant which I bought by mistake thinking it was a cucumber plant and its grown to be huge and is sprouting lovely yellow flowers and a baby courgette. I’ve never grown it before but I will although it’s not a plant for a small garden as it does have healthy growth. The cucumber, bitter gourd vines are now growing slowly as the weather is finally summer.

Well, more on the weekend which I am looking forward to.


Leave a comment

Enjoying my urban garden

I really do love my garden now and have now developed a routine to look after it.If I neglect it for two or three days, I find that a lot of damage can happen. I had a few evening meetings last week and I didn’t get home till after dark and didn’t get to do much. On Friday, I found that there were heaps of weeds that have grown in three days and the plants didn’t look too great.

I find that if I spend about 10 minutes in the morning, picking up snails and maybe sprinkling a bit of water if it is too dry and a good 15 minutes after work before I start making dinner, that is enough to keep up the garden in great shape. I do spend a couple of hours on the weekend doing maintenance work.

This weekend, I only managed about 2 hours of work on Sunday as I was busy the rest of the time.  I did a bit of weeding, loosened soil around the bigger plants and removed dead plants and leaves. The cherry tomato hanging baskets are looking great with tiny tomatoes the size of a thumbnail. I pierced two milk bottle tops using an electric drill and cut the bottom off two milk bottles and stuck them top down on the baskets to keep up a continuous stream of water as the baskets get dried out quickly.  One of the baskets has a normal cherry tomato plant while the other has Cascade which is definitely the variety to use in hanging baskets from the way they look. I tried to train the other plant down by trying up with garden wire.


The cherry tomato baskets on the wall


I am now harvesting about 5-6 strawberries a time which is not much but just enough for breakfast or a smoothie with some other fruit. I use most of my herbs now in cooking. Mint is growing well and so are chives for egg sandwiches, oregano for pasta, dill for salmon and heaps of coriander for Indian dishes. I also have an abundance of spinach so might have to blanch and freeze soon.

Last year, I planted tomatoes and chillies in a small bed above which the garden tap is placed. Every time I used the hose, I would break a few tomatoes off as the hose would hit them. This area had grass before and still has couch grass and other weeds that come up which usually overtakes any vegetable plants I planted.  This year, I planted mixed parsley under the tap with one tomato plant in a corner which seems to have worked. The parley grows as a ground cover and is not tall enough to be broken by the hose and it has thrived under the tap. I still need to get rid of the couch grass by pulling it out manually.

A mix of Italian and curly leaf parsley grows in the tiny area under the garden tap.


My few corn plants are about a foot high and the silver beet is thriving.  


Runner beans in flower with a few tiny pods

 The runner beans are flowering and I can see tiny beans appearing. I tied them up to train them to stay within the bean structure. I also removed the excess leaves from tomato plants so that I get more fruits and less leaves.  The only plants that I am not happy with are the Asian vegetables like bitter gourd and okra which are growing too slowly. The chilli plants are also still small so I sprinkled some fertiliser around them although my veggie bed seemed full of fertiliser from the healthy growth of other plants.


Green chillies beginning to flower

Made a mental note to plant another six-pack of lettuce as the second batch of lettuces are maturing beautifully. The trick of planting 6  lettuce plants every 3-4 weeks in between old lettuces works. Once the old plants are pulled out, the younger plants get more room to grow and I get a continuous supply of lettuce through the summer. When I started gardening, I planted two punnets of lettuces which all matured together and went to seed. This year, I decided that such waste can be eliminated if I plant smarter. I also try to get mixed lettuces so that we don’t end up eating the same variety over summer.

Lettuces old and young

I bought a gherkin plant at Bunnings and thought I’d grow it in a pot. This is the first time I am growing gherkins  so lets see how it grows.

Gherkin plant in a pot

I planted two cucumber plants which I want to train to climb the plastic mesh I stapled along my wooden wall. These two survived the snail army and hopefully will keep me in salads throughout the summer. 

Bitter gourd or Karawila/Karela plants

 I love growing Bitter gourd or Karawila in Sinhalese (Karela in Hindi) not because I love the bitter fruit because its furrowed fruits are pretty and they are very expensive fetching as much as $30 a kilo so I like to gift it to friends who love it. It’s very good for diabetics as it reduces blood sugar levels. Karawila fruits can be blended into a horrible tasting bitter drink which when drunk immediately reduces blood sugar levels. The cooked fruits are eaten for its medicinal purposes but I love it sliced, deep-fried and made into a sambal with onions. I havent been able to germinate Bitter gourd in Auckland but I buy it from a Thai woman who sells a variety of exotic plants in the market. More on Karawila later when the plants grow bigger. They are not an easy to grow plant.
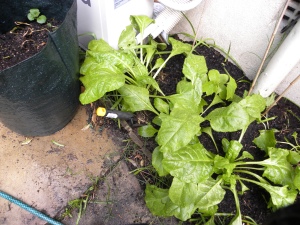
Spinach growing in a recycled Christmas hamper box

My spinach has taken over the neighbourhood!!! Its lush growth, even in the wooden box is amazing. I need to freeze it as I am not in a mood to eat it all this week and I am on a pre-Christmas speed diet. There is only so much spinach one can eat in a family of three with one total carnivore who doesn’t eat vegetables unless hidden in his meat loaf or disguised in his spaghetti sauce (even at the advanced age of 25) so will need to freeze the surplus.

My friend Angela visited me on the weekend and she loved the garden and was going to copy some of my ideas like the cherry tomato hanging baskets and planting lettuces along the ledge of the vegetable bed. She called it a beautiful urban garden.
I’ve uploaded some photos finally. Happy gardening and talk to you next weekend.

Design a site like this with WordPress.com
Get started